Make Paper Snowflakes
Beautiful Snowflakes -
Snowflakes are fun to make all year round and a fun craft for kids to make too.
Materials Needed:
- Paper
- Scissors
- Glue
- Glitter
How to make a paper snowflake:
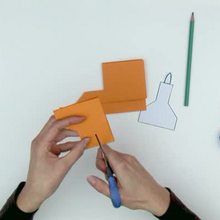
- Get a sheet of 8.5 x 11 paper. Create a perfect square by taking the bottom corner and folding it over to the top, at a diagonal. A 3" (7.5 cm) or so piece will be sticking out. Cut off the excess so you're working with just the square. At all steps in this method make sure your creases are firm and straight.
- Fold the paper in half, in a triangle shape. This is the same fold you made in the first step and is only mentioned in case you unfolded it to cut. Once it's folded once, fold it again, forming an even smaller triangle. At this point, you may fold it again to create a different, much smaller, base for your snowflake.
- Start making cuts. This is where the snowflake gets really good. If you get creative with it, you'll end up with a pattern that's intricate, delicate, and detailed. Or you could end up with a couple of slits in a piece of paper. Cut in curves, angles, and swirls to get the most out of the paper. You may find it useful to hold on to the center of the snowflake -- the very tip. Though you can cut it off and the snowflake will hold together! The more paper you cut off, the flimsier it will be -- not necessarily a bad thing.
- Carefully unfold your snowflake. If you've made a lot of cuts, the snowflake may rip, so be careful. And if your cuts were very small, sometimes the layers of paper stick together.If you're not happy with your pattern, fold it back up and make a few more cuts in the paper.


