Minnie Mouse Halloween Witch Hat

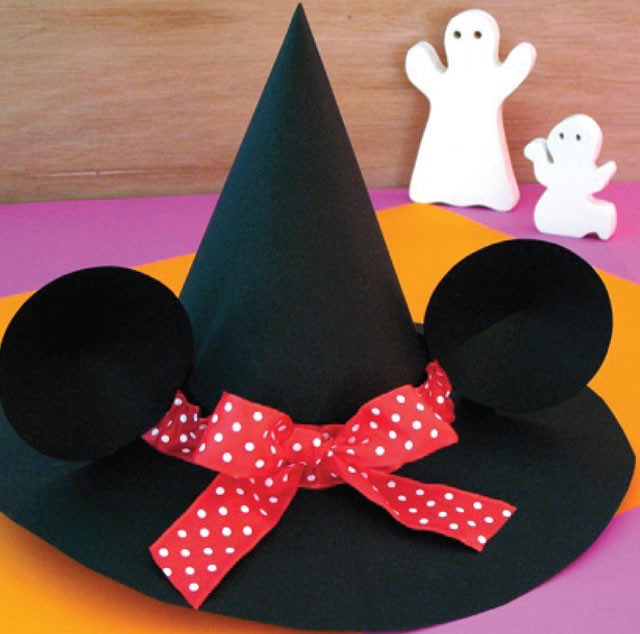
Minnie Mouse Witch Hat DIY craft by Disney Junior!
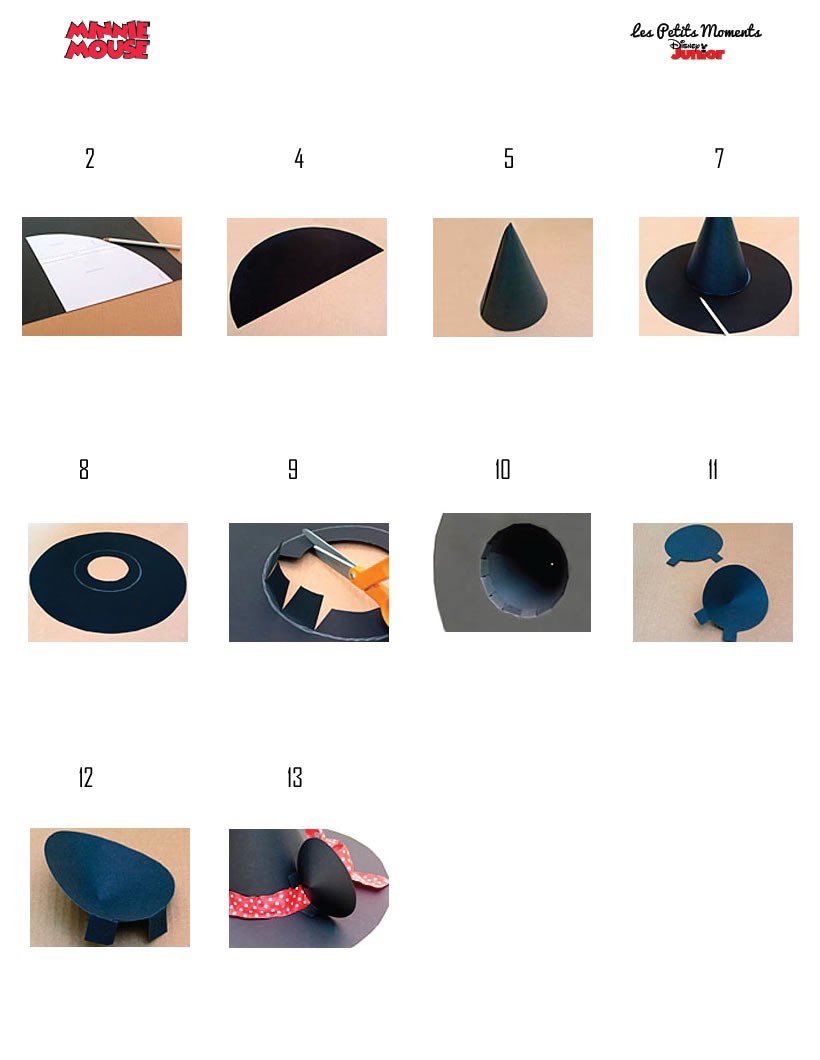
Instructions: (See picture diagrams below)
- Print the template and cut out the pieces. Tie together the two pieces of ¼ of a circle with tape.
- Place the quarter circle on black cardboard paper as pictured. Trace the outline along the curved side (use a white pencil to better see the graph).
- Rotate the model and draw on to get a semicircle.
- Cut out the semicircle.
- Wrap it on your child's head to form a cone size. Paste superimposing a little edge.
- For the brim, place the pie dish (or other round object large enough) on the second sheet of black paper and trace around and cut out.
- Place the cone in the center of the large circle, and then draw the outline of the cone.
- Hollow out the center, but by cutting a little more than you drew a circle.
- Cut around the tabs to drawn, as in the photo circle.
- Place the cone on the tabs and paste them inside, as pictured.
- For the ears, overlap the two sides of the gap between the two tabs. Paste.
- Fold the tabs toward the back.
- Glue the ears on the hat hat, placing a tab on the cone and the other on the brim
Materials Needed:
- The printed templates
- Scissors
- Duct tape
- 2 large sheets of black cardboard paper
- A pencil
- Glue
- A large round object to trace the outline (eg a pie dish of about 12 inches in diameter)


