Salt Dough Instructions

Recipe for Salt Dough
- 1 plus 2/3 cup flour
- 2/3 cup salt
- 1/2 cup water
How To
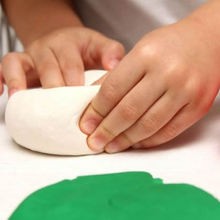
- Knead the dough until it becomes soft, so it does not crumble when you are working with it. However, if you notice that it comes off, add a little water. However, if it sticks to your fingers, add a little flour.
- Let the dough rest for an hour before starting.
- Tips: Add a tablespoon of glycerin to make dough more elastic (or 1-2 tablespoons of glue tapisserv powder form to be diluted in water).
How to add color
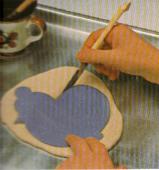
- Once completely dry, you can paint the salt dough with water paint. So that the colors come out more vibrant, have a first layer of opaque white before applying the final color.
- You can also color the dough from the start. Divide the dough into as many lumps you want to color, then add a few drops of food coloring on each.
- To get brown, just add a teaspoon of cocoa (with a little water if necessary) or instant coffee dissolved beforehand in water.
Varnishing the pieces
The thick varnish offers very good protection against moisture. If you do not like the shiny look, use a matt varnish.
How to work the dough
- It is advisable to work directly on a baking sheet if you want to cook your creations, so you do not mess it up when you want to transport them.
- Do not store the dough in the fridge, put it in an airtight container or aluminum foil.
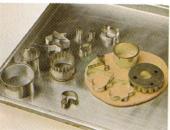
- For your creations, you can use cookie molds after rolling out the dough 1/2 cm thick.
- You can also use patterns: Place the pattern on the dough sheet and cut around with a sharp knife.

Oven Drying
It is important to dry the work before putting it in the oven. Therefore wait until the top is white before baking. Here are the recommended cooking times for an electric oven:
- In 1 hour at 165 ° F for 0.5 cm thick
- ½ hour then at 210 ° F
- ½ hour then at 250 ° F
- Then 1 h at 300 ° F
For the dough colored salt cooking times are different : To ½ cm thick:
- 1 hour at 120 ° F (the first time must be extended depending on the thickness)
- ½ hour at 165 ° F
- ½ hour at 210 ° F
- 1 hour at 250 ° F
If you have a gas oven, reduce the cooking time by half.
Open Air Drying
Allow about 1 day for drying. Water evaporates slowly so it is normal that the shape shrinks a bit. In summer you can dry them in the sun, it will be faster.
Creative Ideas and Decorations
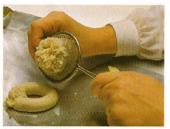
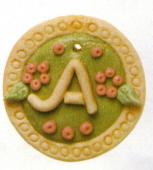
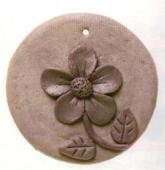
Once obtained the desired shape, do not hesitate to unleash your imagination in terms of decoration. You can indeed add elements on the dough as coffee beans, grains of rice, dried flowers ... You can also use a fabric print you will lay out the dough. You get pretty reliefs! For sawdust, salt dough, good for imitation animal skin, hair, foliage ... you just have to move a ball of dough through a sieve.
