Robot Play-Doh Figure
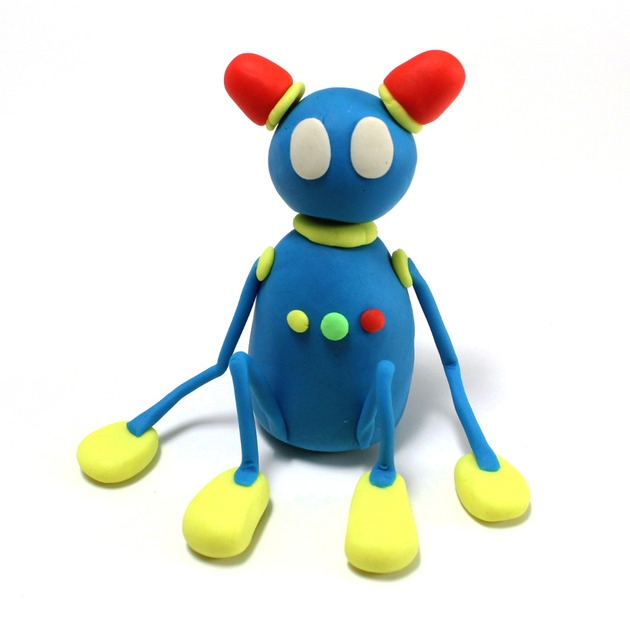
DIY clay robots. We will show you how to make a small robot out of plasticine! First, we suggest you make the various parts of the robot first, and then assemble them. Like a true artist!
Necessary material
- Blue Plasticine
- Yellow Plasticine
- White Plasticine
- Red Plasticine
- Green Plasticine
How to make a clay model robot
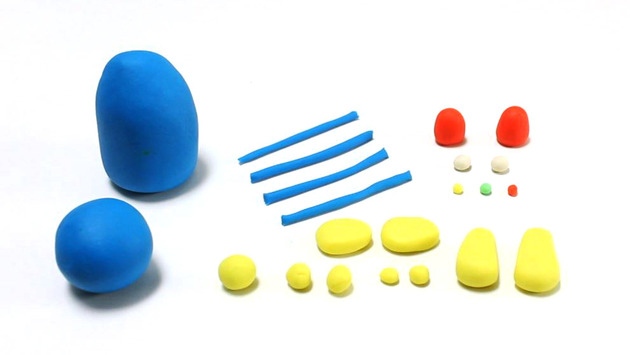
The parts of the robot
- Made two balls of blue clay, a big and a smaller one.
- Extend the big blue ball in an oval shape.
- 4 sticks of blue clay of the same length as the elongated oval ball.
- 5 small balls of yellow clay, one large, two smaller and two even smaller.
- The same yellow color, make 4 flattened oval shapes with two of them thicker.
- Make three tiny balls: one yellow, one green and one red.
- Make two white balls slightly larger.
- Make two small red balls of elongated oval shape.
The assembly of the robot
- The biggest yellow ball placed on the top of the big blue oval ball and flattened it well.
- Place the blue ball above by fixing well.
- Place the two yellow balls a little smaller on both sides of the robot's head, roll them well.
- Now attach the red balls lying on the latter two. Fix them well, it is the ears.
- Attach the white balls on the robot's head, it is the eyes. Flatten them well.
- Under the neck, both sides of the robot placing the last two little yellow balls, and flattening them well.
- Two blue sticks and attach the little yellow balls. These are the arms.
- Now attach the three small balls remaining on the torso of the robot.
- Attach the two remaining blue sticks with both larger yellow ovals. Place the other two ends under the robot, by bending. These are the legs and feet.
- The remaining two ovals attach to ends of the arms to the hands.
There you go! You completed your little clay robot model.


